
Creating Cyanotype Digital Painting
In the early days of photography, long before the cyanotype digital painting process, images were exposed on wet glass plates covered with chemicals to create an emulsion before film and digital. One of the early processes of the emulsion was called Cyanotype. Initially developed by the English scientist and astronomer Sir John Herschel in 1842, Cyanotype was the first successful non-silver photographic printing process.
He developed the process, but Anna Atkins took Sir John Herschel, a scientist and family friend, the original method and developed it into photographic history.
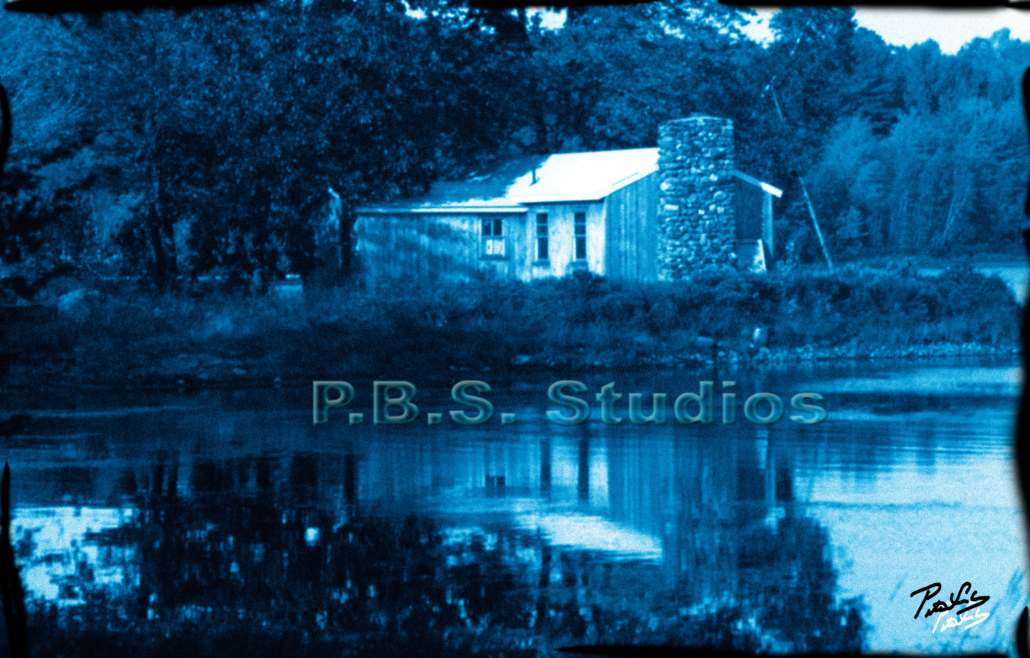
Figure 1: Cabin on the Lake Cyan with Frame
Original Cyanotype Process
To create the emulsion, Herschel (who is widely credited with coming up with the word – photography) used two chemicals, Ammonium iron (III) citrate and Potassium ferricyanide. He combined these chemicals in water and then coated the liquid on the material (usually paper), producing a positive image by exposing the material to a source of ultraviolet light (such as sunlight). The result is an insoluble blue dye (ferric ferrocyanide) known as Prussian Blue.
He would then flush the image with water, washing away the water-soluble iron (III) salts while the non-water-soluble Prussian Blue color remained.
Creating a Cyanotype image was a simple, cheap, and reasonably permanent solution. It became popular in engineering circles well into the 20th century. It enjoyed an extended period of commercial success for large-scale copying of office drawing plans, often called “blueprints.”
The drawback of using the Cyanotype process timewise is that it’s slow. Using a standard UV light source on a stable surface to create the image requires thirty minutes or more exposure to complete.
The primary ingredients (Ammonium iron (III), citrate, and Potassium ferricyanide) must be stored separately. One of the biggest challenges is getting the right amount of chemicals on the image. The paper often will not absorb the chemicals, making the paper tacky, which can wreck your negative. Stained highlights often happened due to inadequate clearing and ‘bleeding’ of the Prussian Blue. The final result of the image depended on proper drying procedures.
The Cyanotype process was made obsolete by dry, plain paper photocopying. Still, the word ‘blueprint’ persists in our language, with an expanded meaning. Case in point, although they’re still called “blueprints,” the inks used in many architecture and engineering drawings are drawn in black instead of blue ink.
Creating a Cyanotype Digital Painting Image
Although you can use the old-fashioned method of mixing chemicals to create a cyanotype, today you can use an alternative method with a digital editor like Adobe Photoshop to create a cyanotype digital painting. Using the following step-by-step approach, you can take an image and emulate a cyanotype image.
- Selecting an Image
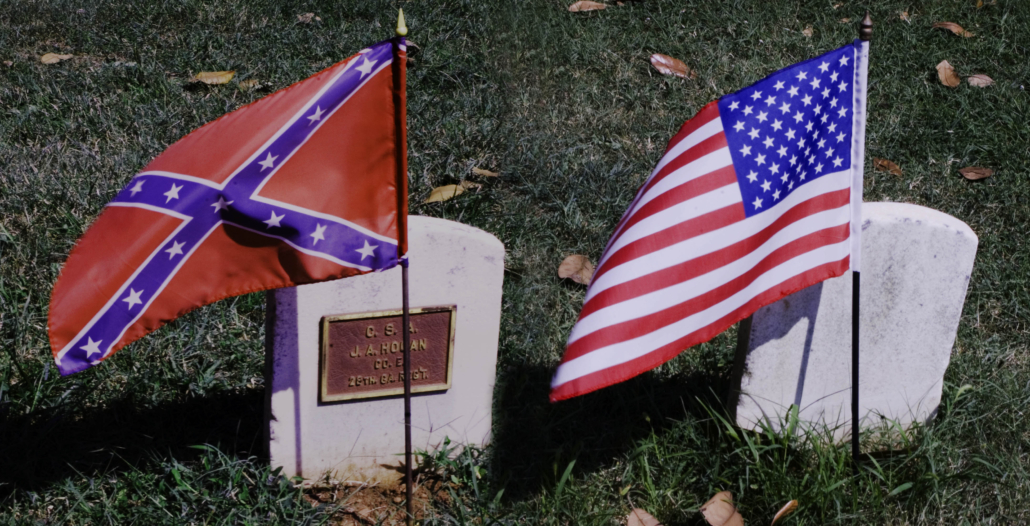
Figure 2: Appomattox Flags Original Image
Convert Color to Black and White
Adobe Photoshop has many methods for converting a color into a black-and-white image. I’ve tried many different conversion processes with “varying” results. The following is one of the simplest ways to convert color to black-and-white photos.
- Create a duplicate background layer.
- Click Layer > Adjustment Layer > Channel Mixer.
- Click on the Monochrome checkbox located in the bottom left-hand corner. The resulting image is too high contrast.
- Make adjustments to lower the contrast. My choice for this image was 20% for Red, 100% for Blue, and zero for Green. Your adjustments will depend on the type of image selected.
- Click OK. The result is a black-and-white image with a full range of gray-scale tones.
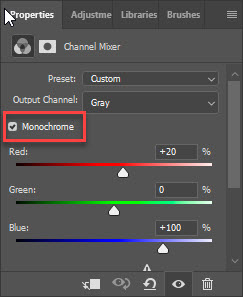
Figure 3: Channel Mixer
Add Blue Color
To bring the cyan blue monotone color back, use a Curves Adjustment layer to create the appearance of blue color in the Cyanotype image. After the image is open, do the following:
- Click Layers > Adjustment Layer > Curves.
- Click on the Output Channel drop-down list box and select Blue.
- Move the curve line upward. A blue tint will appear over the image. Continue until you achieve the desired result.
- Click OK.
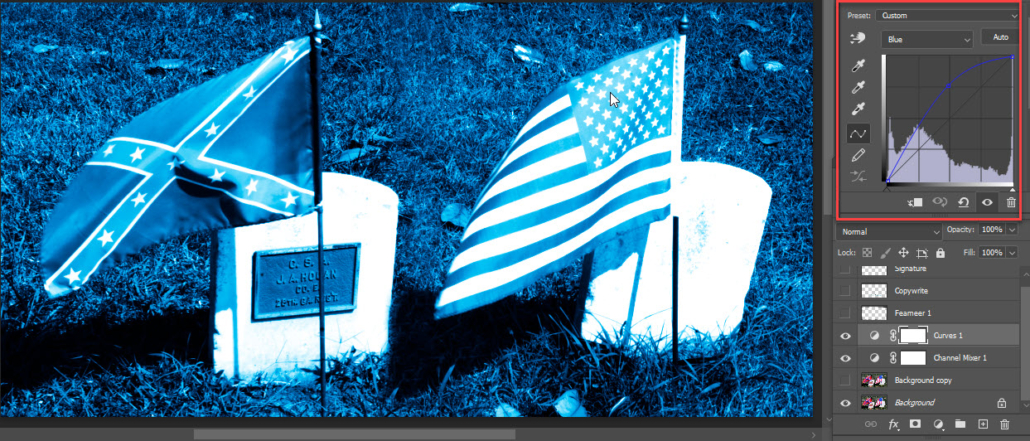
Figure 4: Curves Output Channel Blue
Refine the Cyanotype Color with Red
To further define the blue tint color of the Cyanotype image and make it look realistic, add another adjustment layer by doing the following:
- Create another Curves Adjustment layer.
- Select Red in the Output Channel from the drop-down list of colors.
- Move the Curves line down further to define the image. The result is a cyan-type-looking image.
- Click OK.
Make it more Realistic – Blur to Age
Due to the slow-developing process, many cyanotype images look slightly blurry, looking somewhat out of focus. You can emulate this using a Gaussian blur filter.
Select the image layer and put a slight blur to make the image look more realistic and aged.
Click Filter > Blur > Gaussian Blur. My choice was 3.0. Since this image was too bright, I created another adjustment layer to tone down the brightness.
Put a Boarder to Frame
Another way to make the image look aged is to create another adjustment layer. Using a large, soft-edge brush, paint a black border around the edge of the image, making the edge appear discolored.
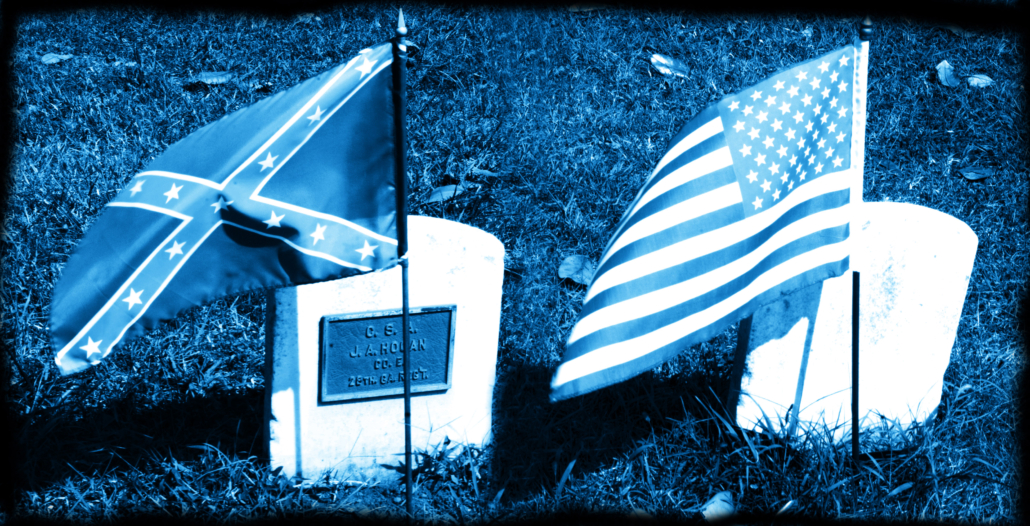
Figure 5: Cyanotype Image with Border
Using this simple process through Adobe Photoshop or some other digital editor, you can put a new twist on your images by making them emulate an old technique.
Cyanotype digital painting – Add a Signature (Optional Step)
The final step is to sign your cyan photo painting. Open your signature file. Copy and Paste the Signature layer as the top layer. Use Transform (Ctrl-T) to adjust the size of the signature. Move the signature to the final position.
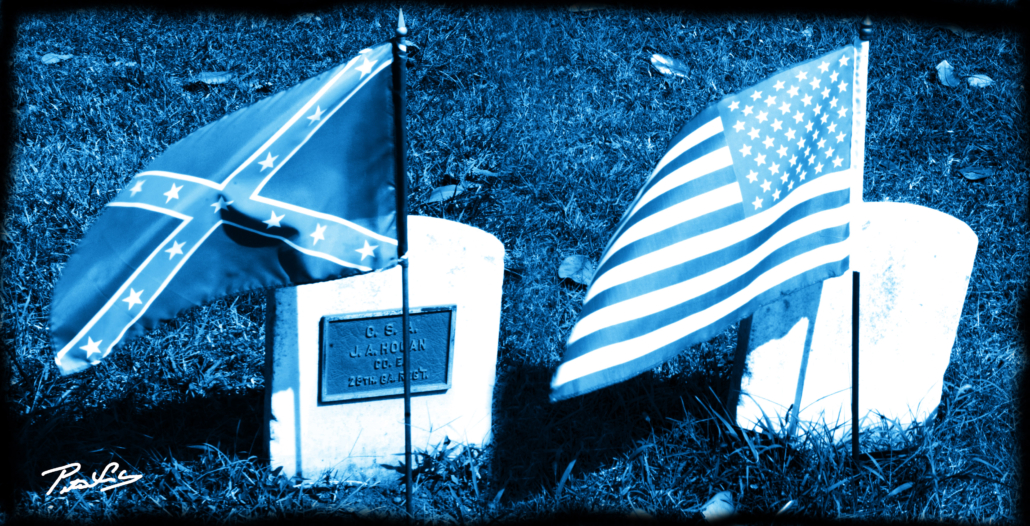
Figure 6: Final Cyanotype Digital Painting Image – Flags at Gravesite
# # #
Sales Plug
This article comes from my book, “Creating Digital Paintings.” To learn other digital painting procedures like this, purchase my book, “Creating Digital Paintings” available from Amazon.com